A Mind Lost
Anything and everything.
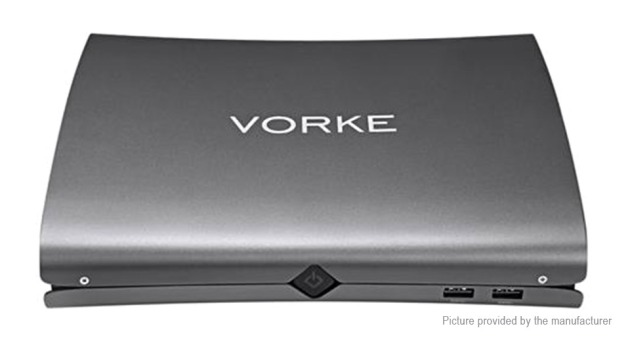
Vorke V6 Mini-PC
(2019/06/24 – This post has been sitting as a draft for almost exactly a year, as I’ve been really busy with work and life – and a slight obsession with building a retro-PC that occupied my time and money – so it’s a little out of date and rough around the edges. I plan to polish it as time permits, but I’m publishing it as is to get it out of my drafts).
After being modestly impressed with the performance of the ACEPC AK1, relative to its size and power use, I started looking for something with a little more oomph in a similar form factor. The mini-PC market has grown considerably in the last few years, and looks like it will continue to do so for the foreseeable future, so there’s plenty of options to choose from.
Unfortunately, one area where the market hasn’t really improved is price, at least not with regards to models featuring more powerful hardware. A mid-range ZBOX with an i5-7500T runs about $500 to $600 CAD. Models with a dedicated GPU start around $900 (GTX1050), $1600 (GTX1070), and top out at around $2000 (GTX1080, with an i7-7700HQ). These are all barebones, so no storage, and no RAM.
On the Intel NUC side prices are pretty much the same. The seventh gen i3 NUC is around $350, the i5 is $470, and the i7 around $600. The only model with decent graphics is the new Hades Canyon NUC8 with its Radeon RX Vega GPU coming in at around $1200. Again, you have to bring your own storage and RAM.
Given that these products were outside of what I was willing to spend (for what you get), I opted to look again to the stuff coming out of China (okay, yes, technically most of it comes out of China in one way or another). One of my favourite sites for early looks at, and reviews of, all things computer is CNXSoft, a site I check pretty much daily.
One of their recent reviews covered the Vorke V5 Plus, but I wasn’t really interested in another Celeron CPU system. Instead I found the Vorke V6 (on GeekBuying.com) which, on paper (or screen I guess), seems to be a fairly powerful mini-PC sporting hardware from about three years ago. This unit also sells under the name Partaker M1, where it comes in several colours, with different LED colours, and includes a version with a 6th gen. i5 instead of an i7.
So, I purchased the barebones model from GeekBuying in early 2018. At the time, they had a coupon bringing the price down from $606 USD to $419 USD. A short time later, they had it on for $399.99. Now, just over a year later, they have a 9% discounted price, at $549.99 USD ($748.15 CAD, plus another $80 to ship it from China). At its current price (and full price), I really wouldn’t recommend buying one, but at the $400 US price point, it’s a good deal.
When I purchased mine, there were options that include an SSD and RAM, and other less useful options (one with a keyboard, one with a gamepad), but these no longer appear to be available. All told it cost me just shy of $630 CAD, plus $23 to DHL Express, and another $180 CAD for some DDR4 notebook RAM. In retrospect, it’s a bit more than I wanted to spend on what will effectively be just another toy to mess around with, but boys and their toys.
A quick summary of the specs are:
Vorke V6
- Intel Core i7-6700HQ with integrated Intel HD Graphics 530
- 2xDDR4 SO-DIMM slots, up to 32GB
- 2×2280 M.2 slots, one PCIEx4+SATA3, one SATA3-only
- 1xSATA3 2.5inch drive
- nVidia GeForce GTX 960M with 4GB VRAM
- 1xHDMI 1.4, 1xDP 1.2
- Intel 3165 Wireless 802.11a/b/g/n/ac with Bluetooth 4.2
- Realtek 8168 Gigabit ethernet
- 2xUSB3 (rear), 2xUSB2 (rear), 1xUSB Type-C (rear), 2xUSB3 (front)
- Headphone out, microphone in, Optical out
Windows 10 Print to PDF – An error occurred
Update 2018/07/01
I reinstalled Windows 10, and again relocated as much as I could off my SSD. Naturally I bumped into this issue again, but this time I decided to Google it and see if I could find someone who provides a real explanation. I did.
Here’s a link to a post by Ramesh Srinivasan on Winhelponline, where he explains what’s going wrong and offers a much more comprehensive solution to the issue.
Cutting and pasting from Mr. Srinivasan’s post, the solution is to execute the following commands from an elevated command prompt:
icacls %temp% /inheritance:r
icacls %temp% /grant %username%:(OI)(CI)F /T /C
icacls %temp% /grant Administrators:(OI)(CI)F /T /C
icacls %temp% /grant System:(OI)(CI)F /T /C
md %temp%\Low
icacls %temp%\Low /setintegritylevel (OI)(CI)low
I also made the mistake of setting the environment variable to use my %USERNAME% environment variable, instead of setting my username directly. This is a mistake, as often the username of the process can be something other than yourself, in which case it goes looking for a nonexistent folder (e.g. in my case D:\Users\SYSTEM\AppData\Temp).
Thanks to Mr. Srinivasan for the fix.
This is a quick one, and half-assed.
While trying to use Windows 10s built-in Print to PDF functionality was giving me an error, an error that wasn’t particularly informative.
Short version, it has to do with my changed TMP (or TEMP) environment variable. I’m not sure which, as I have both of them pointing to the same location, which is a different location from the default.
To minimize writes to my SSD, I pointed TMP and TEMP and to a path on my mechanical drive, where I have a D:\Users\USERNAME folder containing my as-relocated-as-possible C:\Users\USERNAME folder.
The virtual printer didn’t like the permissions on the relocated temporary folder. I’m not sure which local account it’s using as I didn’t really dig too deep, so I just granted full control to Users and Authenticated Users on the temp folder and it worked again.
ACEPC AK1

Not that I need another computer, but there’s just something about getting a new bit of hardware to play with. After being impressed with the performance of the QNAP-TS251+ with its Celeron J1900 CPU, I’ve been itching to get a mini system with a low watt processor. There’s a lot of options out there, from dirt cheap ARM SBCs to pricey high-end i7 Intel NUC systems. Some of the hardware I’d been looking at includes the Udoox86 Ultra, UP Squared, Raspberry Pi 3, ODROID-XU4, and a myriad of lower-end Intel NUC and Zotac ZBOX systems. I’ve been hemming and hawing over picking up any one of these devices for months now.
A few weeks back, GearBest had a sale on the ACEPC AK1 that I just couldn’t resist. The ACEPC AK1 is a mini-PC similar to (some might even say cloned from) the HP Elite Slice. Slightly smaller than a stack of five CD jewel cases, its hardware specifications are:
- Intel Celeron J3455 with integrated Intel HD Graphics 500
- 4GB DDR3L RAM
- 32GB eMMC storage
- Intel AC3165 Dual Band WiFi (supports 2.4GHz & 5GHz) and BlueTooth v4.0
- Ethernet RJ45 10/100/1000M
- 2xUSB 2.0
- 2xUSB 3.0
- 2xUSB Type-C (one internal)
Slackware64 in VirtualBox with UEFI
After years of resisting the BIOS‘ successor, UEFI, a nifty little bit of hardware I recently purchased has left me with no alternative but to finally figure out how the darned thing works. To experiment, I turned to Oracle’s VirtualBox hardware virtualization software, and my go-to Linux distribution – Slackware. At the time I’m writing this, Slackware 14.2 is the latest release, while VirtualBox is at v5.1.28.
Random Surfing Leads to Familiar Places
For a while now I’ve been tempted to try to put together a retro-gaming PC (I’ve also been kicking my own ass for getting rid of so much great – and perfectly functional – hardware that I’m now interested in buying again, such as my AWE64 Gold, or 3dfx Voodoo 3… damn damn damn). Playing with MS/FreeDOS in a VM, and with DOSbox, is fun, but it doesn’t compare with having the real thing chugging away next to your desk.
While refreshing my memory of the good old days and brushing up on the state of emulation with regards to 16-bit realmode OSs, I came across the OS/2 Museum, which has an absolute ton of fascinating, if useless (to any but the nerdiest of computer nerds) information.
As an aside, the author of OS/2 Museum is one Michal Necasek, a name that tickles at the back of my memory. I know the name, but I’m not certain where from. I think he was fairly active on the Watcom USENET groups right around the time they were preparing to open source it, but I could be mistaken. I’ve been meaning to ask, but time has a way of getting away from me.
Anyway, links lead to reading, which leads to more links, and more reading, until I found myself on a fairly plain page on this web site. It’s about the DESQview multitasking software for DOS, and a few other bits of software written by QuarterDeck, including QEMM. And lo’, long forgotten by myself, there is my tiny contribution to the page, as I am the selfsame Andrew who contributed QEMM 97.
That must have been well over a decade ago, as I don’t remember frequenting comp.os.msdos.desqview much (if at all) after finally making the switch from MS-DOS/Windows 98 to Windows XP back around 2002/2003. I’m really surprised that page is still up, as a lot of the links I came across that supposedly contained The Good Stuff (neat old programs, that is) more often lead to a 404.
Life’s funny sometimes. I went looking for a bit of information on the feasibility of scratching a particularly pointless itch, and find myself “virtually” bumping into a familiar name and a familiar place, both almost forgotten.
Oh, and if you’re interested in old hardware, old operating systems, or just looking for something interesting to read, definitely check out OS/2 museum.
One last thing. While poking around, I found out Vernon D. Buerg passed away in December of ’09. Like a lot of PC geeks who grew up in the 90’s (and 80’s, I suppose), “Vern”‘s LIST program was a mandatory part of my toolbox for years and years. Needless to say, I was quite saddened when I found out, and worse that he passed 6 years ago and I never saw anything about it. I’m surprised it never made it to Slashdot (at least a quick Google didn’t turn up any hits). I’m also more than a little disappointed.
Adblock Plus & Element Hiding Helper
There’s a lot of neat content on Tumblr, but sometimes an individual’s choice of theme leaves much to be desired. In such cases, I switch to archive view, e.g. by going to blogname.tumblr.com/archive/. From there one can view all the posts made to a tumblr by year and month.
I came across one blog that has an annoying hover element on it’s /post/ pages that makes it difficult to get to the content itself. Viewing the source and opening the URL, or viewing the page info and saving from there didn’t take too long to become tedious, so I did a quick Google for a solution.
Enter Element Hiding Helper for Adblock Plus. This extension presents a handy popup that allows one to select an element, refine it, then add it to Adblock Plus‘ filters. Unfortunately, this had the effect of rendering the archive view unusable as the same tag (div class="hover") was used there. Due to the way element filters work there’s no way to limit the scope to only specific parts of a site, it only works by domain name, so to get around this an exception must be added (exceptions can specify more than just the domain name to apply to). What I ended up with, then, is a rule for blogname.tumblr.com##DIV.hover, with an exception as @@blogname.tumblr.com/archive/. This is definitely much easier than searching through the page’s media for the correct image.
Entware-ng on TS-251+
I’ve had a bit more time to mess around with my NAS as I try to make it less just a storage device and more a private home server. Most of the included server software works just fine, and is even fairly up to date (PHP’s only a few minor rev’s out of date, while Apache is the latest 2.2.*).
I’m still a bit annoyed about the SSH daemon restricting logins to the admin account only. Like most *nix users, I’m not overly fond of the idea of working in the root account, where one typo can hose the system. While it somewhat makes sense given the nature of the device, I’d still prefer the ability to log in as any user I like. Assigned to the proper groups, and with the appropriate security considerations and judicious use of account elevation, there’s no reason not to allow it (although neither su or sudo seem to be available in the default firmware).
Enter Entware-ng. I feel like I’m more than a little late to the party, but from what I understand there have been several methods of getting software onto QNAP hardware outside of the QNAP provided Applications installer – Qnapware, Optware, and now Entware-ng.
Entware-ng is a “software repository for embedded devices like routers or network attached storages” that uses the OpenWrt buildroot to bring many (about 1,800) software packages to numerous Linux devices and architectures.
Installing Entware-ng on my TS-251+ was as simple as downloading one package and installing it via the QTS App Centre. The TS-251+ runs x86_64 Linux, but I grabbed the autodetect package and let it do it’s thing.
Entware-ng installs to the /opt directory, which ends up as a symlink to /share/CACHEDEV1_DATA/.qpkg/Entware-ng/ (CACHEDEV1_DATA is the root of the internal storage on the NAS). Beneath it, we have all the usual subdirectories like bin, share, etc and so on.
Once installed we can shell into the NAS and manage packages via the opkg package manager (*sigh* another bloody package manager to become familiar with). There’s a list of available packages one can peruse, and it seems to be quite exhaustive. If you need a SSH client, and are on Windows, PuTTY is highly recommended. I usually just use the SSH client available as part of MSYS2. Cygwin also includes a SSH client, as does pretty much every Linux distribution.
At this point I’ve only installed a few packages to test things out, like Midnight Commander and sudo, in preparation for having an unrestricted SSHd. I feel like I’m playing catch-up on the last few years of (embedded) Linux stuff. I haven’t really used Linux outside of running a few VMs here and there (I’ve just setup an ArchLinux VM to try it out) for a number of years now, and beyond occasionally opening up an MSYS2 or Cygwin shell to use some *nixy command, my *nix-fu has become quite weak. Plus, I find that as I get older it gets harder and harder to learn and retain this stuff, or even remember things that I remember knowing!
Next up I’ll have to figure out how to get the Entware-ng SSHd running in place of the stock QNAP version. I’d also like to set the NAS up as a DNS server with dnsmasq servicing requests for my home network, and maybe even a web proxy with squid. I’m also planning to check out the OpenWrt buildroot system, as I know just the very basics about cross-compilation. For the time being, it’s back to the forums and wikis to wrap my head around this stuff. If the process is complicated, I’ll follow up this post with another detailing what steps were necessary. Then again, I might just be thick and making this out to be harder than it is.
Getting old sucks, btw.
QNAP TS-251+
A while back I picked up my first NAS, a QNAP TS-251+. I’ve been wanting to set up some sort of network storage for years now, but never really had the means (read: money) to do so. I had considered repurposing an old computer to run something like FreeNAS, but ’round here they’re usually handed down to family members as I upgrade to newer hardware. The other problem, of course, is that desktop-class hardware is overkill for such a job.
The TS-251+ is a slight upgrade over it’s predecessor, featuring a quad-core 2.0 GHz Intel Celeron processor capable of bursting up to 2.42GHz (the older TS-251 features a dual-core part clocked at 2.41GHz that can burst up to 2.58GHz), 2GB of RAM, and supporting up to two drives. I upgraded the RAM to 8GB with a pair of Corsair Vengeance 4GB sticks, which is the maximum amount of memory the unit supports.
For storage, I bought a pair of 3TB Western Digital ‘Red’ NAS drives, configured to run in RAID 1 (mirroring). As I’m primarily using the NAS as a backup solution, redundancy is particularly important. While it would have been nice to load it up with the biggest drives it can handle, the 3TB drives were at the sweet spot between price and capacity. I also have a 3TB Western Digital MyBook that, once I get everything organized, I’m planning to wipe and use to backup the NAS, just in case.
On the software side, the NAS runs a 64-bit Linux… sorry, GNU/Linux, underneath QNAP’s interface. While it’s set up a little differently from what I’m used to (Slackware, primarily), it’s familiar enough that I’m not too lost. There’s a decent selection of server software available, including Apache, ProFTPd, and SSH.
One annoyance, however, is that only the admin account can be used to connect via SSH. There’s no easy way around it as, from what I’ve read, this behaviour is hard-coded into the server binary. Digging through old forum posts and the QNAP wiki did yield some ways to bypass the restrictions of the SSH server, but no sooner would I look deeper into what was suggested before I’d come across information that would render the suggestions moot. Turns out there’s been a handful of methods of getting 3rd party software onto QNAP’s devices (Optware?), but the ones I looked into had been deprecated in favour of something called Entware-ng. I haven’t really had time to look into it further, but it seems like it should be possible to install a SSH daemon that’s not restricted.
Other than slowly starting to migrate my media collection to the NAS, I haven’t done a whole lot else with it yet. All my music and a handful of videos are on it, and play fine over Samba, although occasionally my computer loses connection with the NAS. I’m not sure what’s going on here, but I suspect it’s my router; I’ve got a shitty Bell Connection Hub that’s a combo modem/router. The routery part of it is not that impressive. Unfortunately, when I tried putting it into bridged mode to run my own router, I ended up getting lower throughput than running everything through the CH. Why, I don’t know. The modem has Gb ethernet ports, as does my ASUS router, so there’s no reason the speeds should be lower.
But I digress. The NAS supports a bunch of neat features I’ve yet to experiment with like on-the-fly media transcoding and virtualization. I did set up a wiki with DokuWiki to make it a little easier to share some stuff. I went with DokuWiki because it supports flat files for content storage. Although the NAS includes an SQL server (MariaDB), flat files are ideal for my needs.
My family’s not all that used to things like SMB shares and network drives and all that, but a web page is something they can understand. It’ll be tedious, creating pages for the stuff they want, but I’m sure there’s some bit of software out there that can make the process easier. If not, it’ll be a great excuse to brush up on my shell scripting, or maybe learn Python, to hack together some sort of a tool that can be autorun from a cron job to automate pulling data out of info files to generate content accessible through DokuWiki.
First, though, I’ve gotta finish dumping several gigs of content onto it.
I wish I had something more informational to post, rather than just rambling on about some piece of hardware I bought, but I don’t. I need to find something interesting to say, instead of leaving this blog to languish.
David Berlinski makes an ass of himself defending intelligent design
I know of no critic of evolution—perhaps save the late William F. Buckley, Jr.—who is at once so eloquent and so ignorant as David Berlinski. The man has spent years attacking evolutionary biology and defending intelligent design (ID), and is, to my knowledge, the only living creationist who is not religious. (He claims to be an agnostic, though I have trouble believing that.) He’s also a Senior Fellow of the Discovery Institute, a position reserved for only the Highest Poo-Bahs of Ignorance.
Yesterday, at the Discovery Institute’s News and Views site, Berlinski wrote “Majestic Ascent: Berlinski on Darwin on Trial,” a post apparently designed to fête the twentieth anniversary of Phillip Johnson’s execrable Darwin on Trial: the book that launched the ID movement. Johnson’s book is full of inaccuracies and lies (I use the word deliberately, because no honest scholar could make the claims that he did). And…
View original post 1,646 more words
PDFCreator
It’s been many a long year since I’ve had a physical printer connected to my computer; instead, I’ve been using PDFCreator as a virtual printer, the output of which I can then send off to the real printer connected to another household computer if necessary.
Unfortunately, the developers started included some pretty shitty “extra” software in 2009. Over the years they’ve changed what crapware is installed, but never removed it entirely. So, on to the point of this post – installing PDFCreator v1.6.2 (current as of March 2013) without any extra crap.


This is the point where one really needs to start paying attention. I unselect Images2PDF and PDFArchitect, because I (initially) had no freaking clue what they are and was installing a virtual printer, not a kitchen sink. Incidentally, Images2PDF supposedly lets you make a PDF out of images, and PDFArchitect looks like a PDF editor of sorts. But with no description in the installer, the average user will have no idea.
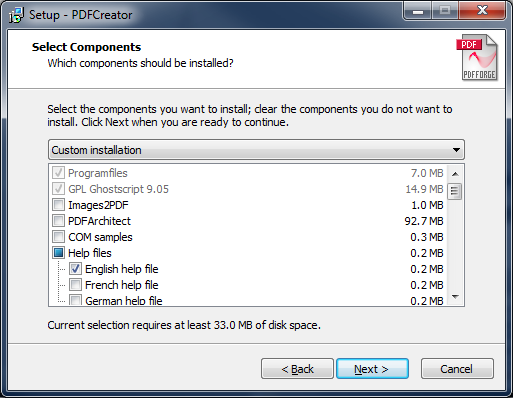
I also unselect the COM samples option, and ensure only the English language translation and help file are installed.

After selecting what parts of PDFCreator will be installed, we come to the disingenuous part of the installer. It’s deceptive that “Express” is marked as recommended, and the “Custom installation” option is grayed out (which implies it’s not selectable at all). Adding “(advanced)” is the icing on the lame-cake; it’s a sure-fire way to scare off the general computer user.

Select the “Custom installation (advanced)” option, and uncheck each of the previous hidden boxes.

But wait, there’s more! As if avoiding one round of crapware wasn’t enough, we’re presented with a second! The wording “I accept” and “I do not accept” are again deceptive. Just select “I do not accept” and move along.

Triple check the options listed, ensuring just the components desired are installed.

I don’t have a problem with software developers, even Open Source developers, trying to make a buck off their work. Generosity and a desire to share doesn’t put food in your belly. But being disingenuous and deceptive not the right way to try to earn a few dollars.
Unfortunately, I haven’t found an acceptable alternative that delivers the functionality of PDFCreator that I desire. I’ve been meaning to dig out a copy of Visual Studio and see if I couldn’t roll a crapless installer based on the available source code, but just never seem to get around to it (and have completely forgotten what little I knew of VB anyway).

You must be logged in to post a comment.